Why Your Nail Polish Always Chips Within 2 Days (And How to Finally Fix It)
You spend twenty minutes carefully painting your nails, the color looks perfect, and you go to bed feeling good about it. Then two days later – sometimes even the next morning – there’s a chip on your index finger, then your thumb, and suddenly the whole manicure looks like it’s falling apart. Sound familiar?
This is one of the most common nail frustrations out there, and the internet is full of half-answers. Use a better polish. Try gel. Just accept it. But the real reason your nail polish chips so fast usually has nothing to do with the brand of polish you’re using. It comes down to a handful of very specific mistakes that happen before, during, and after application – and once you identify them, the fix is surprisingly straightforward.
Let’s go through every real reason this happens and exactly what to do about it.
The Problem Almost Always Starts Before You Even Open the Polish
The single biggest cause of early chipping is an improperly prepared nail surface. Most people skip straight to painting, but what’s on your nail plate before polish touches it matters enormously.
Skin oils are the main culprit. Your nails naturally produce oils, and throughout the day your fingers transfer even more oil onto the nail surface from your face, your hair, your food, everything. Polish does not bond well to an oily surface – it sits on top rather than adhering properly, and that’s why it peels away so quickly.
The fix is simple. Before you apply any polish, wipe each nail with a cotton pad soaked in acetone or nail polish remover. Not to remove old polish – just to strip away any oil or moisture sitting on the nail plate. This one extra step alone can add several days to your manicure’s life. Do it right before you start painting, and don’t touch your nails or run them under water afterward.
Lotion and hand cream are another hidden enemy. If you moisturized your hands earlier in the day – or even earlier that hour – there’s likely a residue of product sitting on and around your nails. Always dehydrate your nail plate with remover after moisturizing and before painting.
You’re Applying Polish That’s Too Thick
This is a surprisingly common mistake, and it feels counterintuitive. Surely thicker coats mean more coverage and longer wear? Actually, the opposite is true.
Thick layers of polish take much longer to dry all the way through. The surface might feel dry to the touch within a few minutes, but underneath, the polish stays soft and flexible for much longer than you’d think. When a thick coat gets knocked, pressed, or bent before it’s fully cured, it doesn’t just dent – it cracks and chips.
Two thin coats will always outperform one thick coat. Each thin layer dries faster and more evenly, and the resulting finish is harder, smoother, and far more resistant to chipping. If your current polish has thickened in the bottle over time, add a drop or two of nail polish thinner – not remover, which breaks down the formula – and roll the bottle between your palms to remix it.
You’re Skipping the Edges
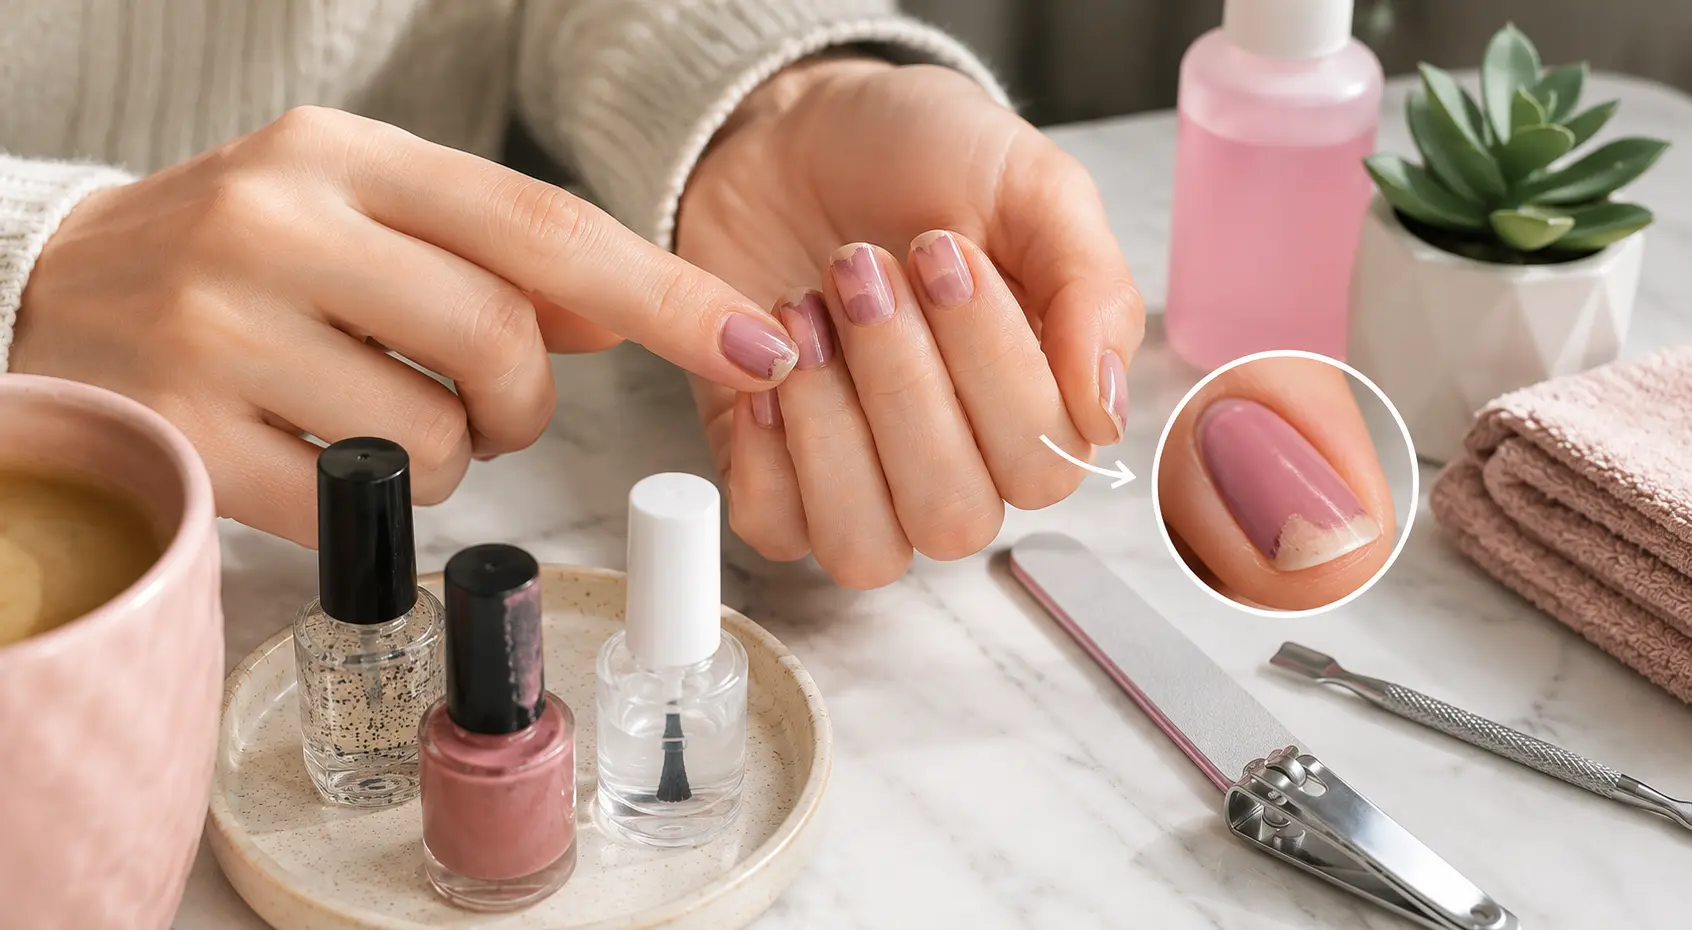
Painting the flat surface of the nail and stopping there is one of the most overlooked reasons for fast chipping. Chips almost always start at the tip of the nail – the free edge – because that’s where the polish is most exposed to contact with surfaces throughout the day.
When you apply your base coat, your color coats, and especially your top coat, swipe the brush across the very tip of each nail to seal the edge. It’s called capping the free edge, and it creates a barrier that stops chips from working their way back across the nail. It takes one extra second per nail and makes a genuinely noticeable difference in how long your manicure holds up.
Your Top Coat Isn’t Doing Its Job
Not all top coats are equal, and an old or low-quality top coat can actually be part of the problem rather than the solution. A good fast-dry top coat should feel slightly thick, go on glossy, and dry to a hard finish within a few minutes. If yours has been open for more than a year, it’s likely degraded and isn’t providing the protection it should.
Beyond the product itself, top coat needs to be reapplied. Most people put it on once and consider the job done, but top coat starts to wear down after just a couple of days. Brushing on a fresh thin layer every two to three days refreshes the shine and adds another protective barrier over the color underneath. This habit alone is one of the most effective ways to extend a manicure by three or four extra days.
Hot Water Is Quietly Destroying Your Manicure
This one surprises a lot of people. Hot water causes the nail plate to expand slightly, and as it cools, the nail contracts again. Polish doesn’t flex the same way your nail does, so repeated expansion and contraction – from showers, dishwashing, long baths – creates tiny stress fractures in the polish that eventually become visible chips.
You don’t have to stop showering, obviously. But wearing gloves while doing dishes and being mindful of how much time your nails spend in hot water does genuinely help. Avoid washing your hair right after doing your nails – the combination of hot water and physical scrubbing is particularly rough on fresh polish. Try to wait at least a couple of hours before your nails get wet after a manicure.
The Base Coat Step Isn’t Optional
A lot of people skip base coat because it feels like an unnecessary extra step, especially when you’re in a hurry. But base coat does something that polish alone cannot – it creates a slightly grippy, adhesive layer that gives the color something to hold onto.
Without it, your polish is essentially sitting on a smooth, slick surface. With it, the color bonds to the base coat, which bonds to the nail. The whole system is more stable and far more resistant to peeling and chipping. Use a thin layer, let it get just slightly tacky before applying color, and never skip it – not even for a quick one-coat look.
Your Polish Formula Might Actually Be the Problem
If you’ve fixed your prep, your technique, and your aftercare, and you’re still chipping fast, the formula itself might genuinely be the issue. Some drugstore polishes, particularly very old ones or very cheap ones, have formulas that simply don’t hold up well. The solvents that help polish stay flexible over time can evaporate, leaving a brittle film that cracks easily.
This doesn’t mean you need to spend a lot of money. Plenty of affordable polishes perform beautifully. But if a specific bottle keeps failing you no matter what you do, it might just be time to replace it. Look for polishes described as long-wear or chip-resistant, and pay attention to whether the formula has a good consistency when you brush it on, not too watery, not too gloopy.
One Last Thing Worth Mentioning
Your lifestyle plays a role too. If you type all day heavily, do a lot of manual work with your hands, or tend to pick at your nails when you’re thinking or stressed, even the most perfectly applied manicure is going to struggle. That’s not a failure of your technique; it’s just the reality of how you use your hands. In those cases, a gel manicure or a gel-effect top coat might genuinely serve you better than regular polish.
But for most people, the chipping problem is entirely fixable with the steps above. Prep your nail plate properly, apply thin coats, seal the edges, reapply top coat regularly, and protect your nails from prolonged heat and water. Do all of that consistently, and a week-long manicure becomes completely realistic, no salon trip required.
Enjoyed this guide? Check out our step-by-step manicure tutorial and nail care habits articles for more ways to get better results at home — right here on NailsWire.