10 Nail Art Designs for Beginners That Look Hard But Are Actually Easy
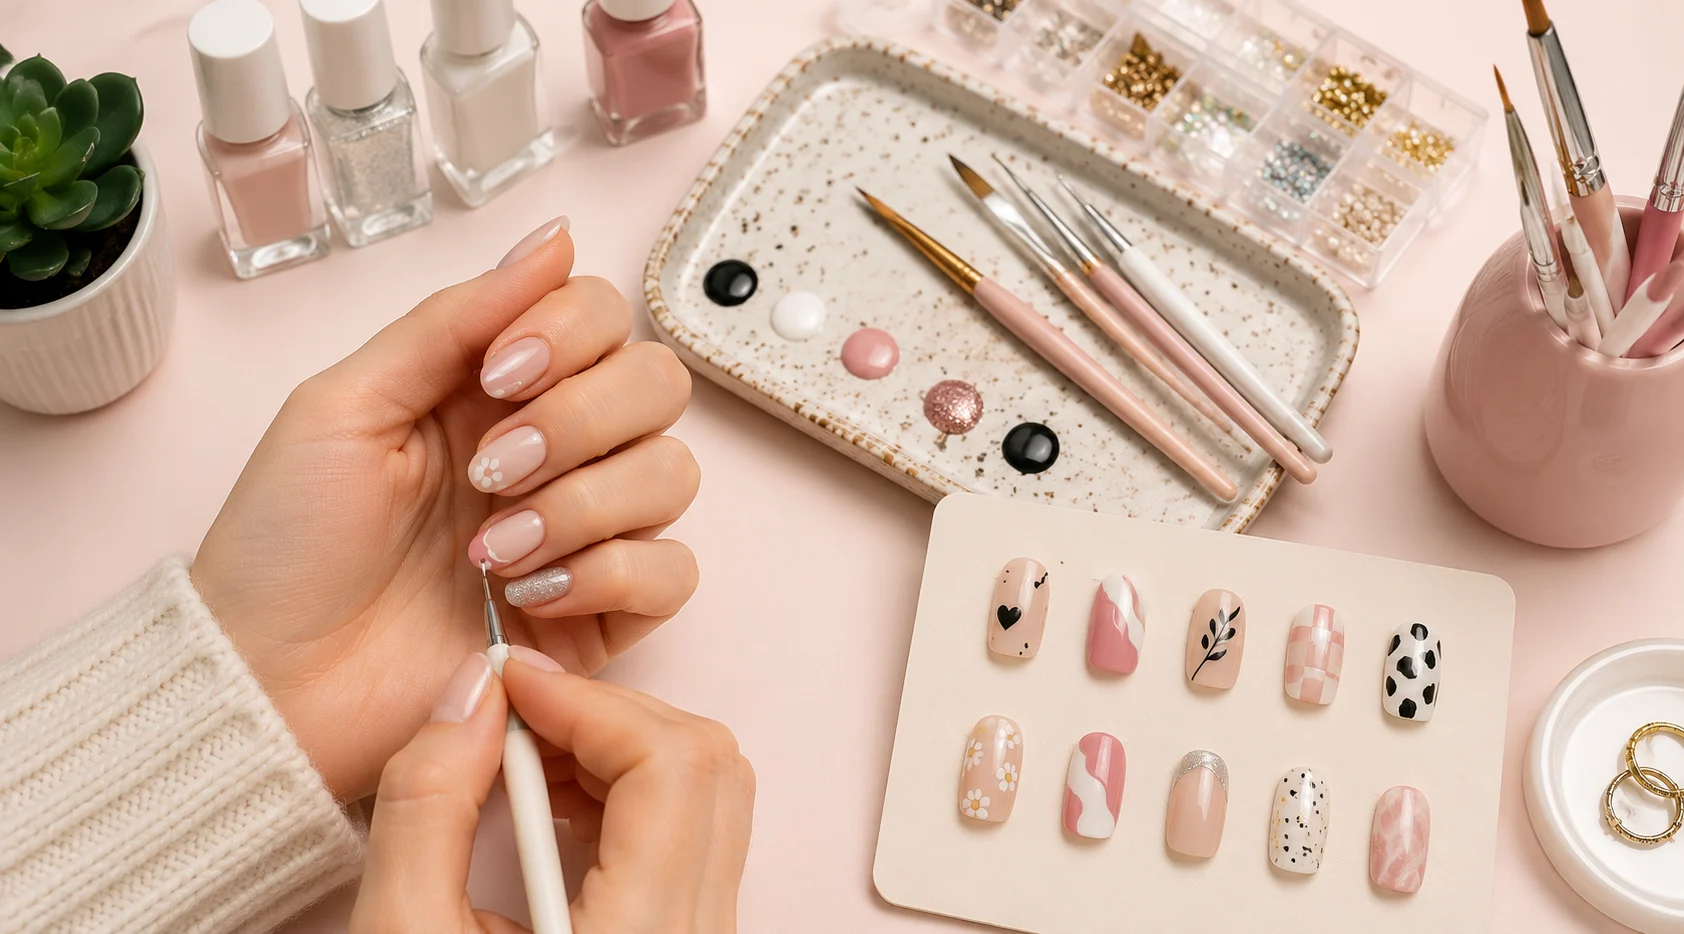
Nail art can feel intimidating. Those flawless Instagram designs with intricate details, perfect lines, and salon-level finishes often make beginners think they need years of experience or expensive tools. The good news? Many show-stopping looks are surprisingly simple to achieve at home with basic supplies and a steady hand.
This article rounds up ten stunning nail art designs that appear complex but rely on easy techniques like sponging, dotting, taping, and layering. Whether you’re a complete newbie or someone who’s only done solid colors, these designs will elevate your manicure without the stress. You’ll need common items like a base coat, top coat, nail polish in various shades, a makeup sponge, dotting tool (or toothpick), painter’s tape, and nail polish remover for cleanup. Most take under 30 minutes once your base is dry.
Let’s dive into these beginner-friendly designs that look like they belong in a high-end salon.
1. Classic Ombre Gradient
The ombre effect, where one color fades seamlessly into another, looks ultra-professional but is one of the easiest techniques for beginners.

How to do it: Apply a base coat, then paint your nails with a lighter shade. Let it dry. Take a makeup sponge, dab a darker complementary color on one half, and a lighter one on the other. Press the sponge onto the nail in a patting motion, blending from tip to base. Repeat until you get the desired fade. Finish with a glossy top coat.
This works beautifully with pinks, blues, or neutrals. The sponge does all the blending work, so imperfect lines disappear naturally. Pro tip: Work quickly before the polish dries on the sponge for the smoothest transition.
2. Sponged Marble Effect
Marble nails mimic expensive stone patterns but require zero artistic skill, just creative dabbing.

How to do it: Start with a white or light base. Drop small amounts of black, gray, and gold polish onto a makeup sponge. Lightly press and roll the sponge across the nail in random patterns. The key is light pressure and multiple light layers rather than heavy ones. Clean up edges with a brush dipped in remover.
The randomness makes every nail unique, and the sponging technique hides any lack of precision. Pair it with a matte top coat for a modern stone look.
3. Negative Space Geometric Lines
Negative space designs (where parts of the natural nail show through) look architectural and chic but are made simple with tape.

How to do it: Paint nails with a sheer pink or clear base. Once dry, apply thin strips of painter’s tape in triangles, chevrons, or straight lines. Paint over the exposed areas with a bold color like black or metallic gold. Remove the tape while the polish is still slightly tacky for clean lines.
This design looks intentional and high-fashion. Beginners love it because the tape acts as a stencil, eliminating the need for a freehand steady hand.
4. Easy Polka Dot Mandala
Intricate mandalas seem advanced, but they start with simple dots.

How to do it: Paint a solid base color. Using a dotting tool or the end of a bobby pin, create a central dot. Add larger dots around it in a circle, then smaller ones in between. Work outward in concentric patterns. Use two or three colors for depth.
The repetitive dotting is meditative and forgiving—imperfect circles add character. Gold dots on a deep navy base create a luxurious evening look.
5. Glitter Gradient with Foil Accent
This sparkling design looks like it requires tiny brushes, but it’s mostly about layering.

How to do it: Create a color gradient as in design #1. While the gradient is still tacky, press fine glitter onto the tips using a sponge or finger. For extra drama, apply one thin strip of gold nail foil near the cuticle on one accent nail per hand.
The glitter naturally fades as you work upward, creating that expensive dipped look without precision.
6. Simple French Tip with Color Block Twist
The classic French manicure gets an easy modern upgrade.

How to do it: Paint a colored tip (try baby blue or soft peach) using a nail guide sticker or freehand if confident. On the ring finger, create a color block by painting the bottom half one shade and the top half another, using tape for the straight division.
This asymmetrical approach looks intentional and artistic while remaining beginner-friendly.
7. Watercolor Pastel Blooms
Floral nails sound difficult, but this version uses soft blending instead of detailed petals.

How to do it: Apply a white or light pink base. With a thin brush or the corner of a sponge, dab very diluted pastel polishes (lavender, mint, blush) in loose petal shapes. Add tiny dot centers with a contrasting color. The diluted polish creates a soft, watercolor bleed effect.
Don’t worry about perfect symmetry—organic shapes look more realistic and artistic.
8. Bold Checkerboard Pattern
Checkerboard nails scream retro-cool but are shockingly straightforward.

How to do it: Paint the entire nail white. Use thin painter’s tape to create a grid, then fill every other square with black polish. For a softer version, use pastel pink and mint green. Remove tape carefully.
The geometric precision comes from the tape, not your drawing skills. This design pairs wonderfully with casual outfits.
9. Galaxy Sponge Nails
Those cosmic, starry night designs that look like they took hours are actually sponge magic.

How to do it: Start with black polish as the base. Using a sponge, layer deep blue, purple, and magenta in random patches. Once dry, flick white or silver polish using a toothbrush or fine brush to create stars. Add a touch of holographic glitter for extra dimension.
The sponge creates natural nebulas, making this one of the most impressive-looking easy designs.
10. Minimalist Thin Lines and Dots
Clean, modern lines look like calligraphy but are created with simple tools.

How to do it: Paint a neutral base (beige or soft gray). Use a striping brush or a very thin nail art pen to draw one or two straight vertical or diagonal lines. Add tiny dots in a cluster on the ring finger. Gold or white lines on a dark base offer high contrast.
Practice on paper first if needed, but remember that slight wobbles add handmade charm.
Final Tips for Success
Always start with clean, dry nails and a good base coat to prevent chipping. Work one hand at a time and allow sufficient drying time between layers; patience prevents smudges. Keep nail polish remover and cotton swabs nearby for quick cleanup. For longevity, seal everything with a strong top coat and reapply it every few days.
These ten designs prove that impressive nail art doesn’t require professional skills or expensive equipment. They rely on clever shortcuts like sponging, taping, and dotting that deliver maximum visual impact with minimum frustration.
Experiment with color combinations that match your style, pastels for spring, deep jewel tones for winter, or metallics for party season. As you gain confidence, you’ll start mixing techniques, like combining ombre with negative space or glitter with florals.
The most important rule? Have fun with it. Your nails are a small canvas for self-expression. Even if your first attempt isn’t perfect, it will still look better than plain nails and give you the satisfaction of creating something beautiful yourself.
So grab your polishes, set aside 30 minutes, and try one of these designs this weekend. You might be surprised at how salon-worthy your nails can look with beginner-friendly methods. Your future self (and your followers) will thank you.